Road markings play a vital role in traffic management, ensuring safety and smooth vehicle flow. A successful road marking project requires high-quality road marking machines, durable road marking paint, and a systematic construction process. This guide covers the necessary steps, best practices, and expert advice required to achieve durable road markings.

1. Pre-Construction Preparation
Before beginning road marking construction, proper planning and preparation are key to achieving optimal results.
1.1 Site Inspection and Cleaning
Remove dirt, debris, oil stains, and moisture from the road surface. Ensure that the road surface is dry and free of cracks or uneven areas. Use a road sweeper or high-pressure air blower for thorough cleaning.
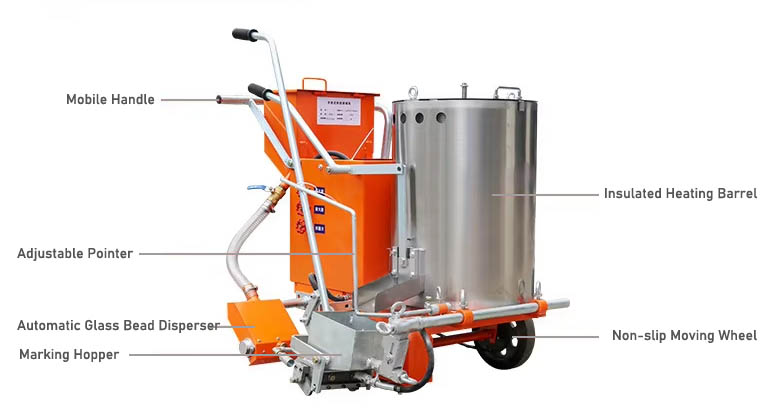
1.2 Equipment inspection and maintenance
Check that the road marking machine is functioning properly. Verify the paint viscosity, spray system air pressure, and thermoplastic paint heating device. Ensure that auxiliary tools such as templates, tape measures, and chalk lines are ready.
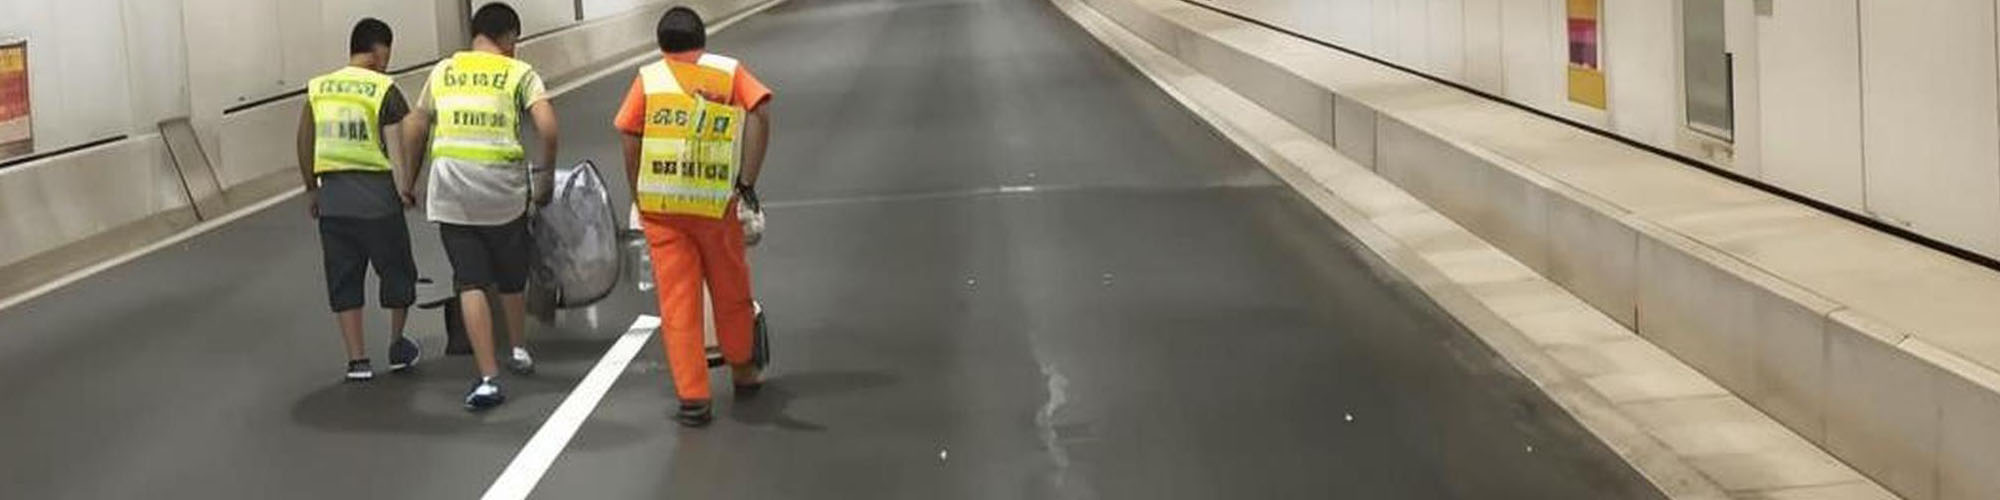
1.3 Traffic Management Plan
Use traffic cones, barriers, and warning signs to safely divert traffic. Schedule construction during off-peak traffic hours to minimize disruption.
2. Road Marking Construction Process
2.1 Primer Application (If Required)
Purpose: Enhances adhesion between paint and pavement.
Method: Apply primer using a brush, roller, or spray system.
Drying Time: Typically 10-30 minutes (varies based on weather).
2.2 Marking Application Techniques
Road markings can be applied using different methods, depending on the paint type:
A) Thermoplastic Marking (Hot Melt)
Process:
Heat thermoplastic pellets in a road marking machine (melting kettle) to 180-220°C.
Apply the molten material using an extrusion screed or spray gun.
Add glass beads for retroreflectivity (if required).
Advantages: Long-lasting, highly durable, and skid-resistant.
B) Cold Paint Marking (Water-Based/Solvent-Based)
Process:
Use a road marking striper (manual or automatic) for precise application.
Apply paint in uniform layers (wet thickness: 0.3-0.5mm).
Allow sufficient drying time (15-60 minutes).
Advantages: Quick application, cost-effective for temporary markings.
2.3 Glass Bead Application (For Reflectivity)
Glass beads are embedded into wet paint to enhance nighttime visibility. Applied at 15-30% bead-to-paint ratio for optimal reflectivity.
2.4 Curing & Drying
Thermoplastic Markings: Cool and harden within 5-10 minutes. Cold Paint Markings: Require 30 minutes to 2 hours (depending on weather). Avoid traffic until fully cured to prevent smudging.
3. Key Factors for High-Quality Road Markings
3.1 Choosing the Right Road Marking Paint
Thermoplastic Paint: Best for highways, high-traffic roads.
Water-Based Paint: Eco-friendly, suitable for urban roads.
Epoxy Paint: Highly durable for industrial zones and airports.
3.2 Optimal Weather Conditions
Ideal temperature: 10°C – 35°C (avoid rain or high humidity).
Use fast-drying paint in colder climates.
3.3 Safety Measures During Construction
Workers must wear high-visibility vests, gloves, and masks.
Use warning signs, barricades, and flashing lights to alert drivers.
4. Post-Construction Inspection & Maintenance
Check line thickness, reflectivity, and adhesion.
Reapply markings if wear occurs due to heavy traffic.
Use road marking removal machines for old line corrections.
A well-planned road marking construction process ensures clear, durable, and safe traffic markings. Contractors can achieve long-lasting results by using advanced road marking machines and high-performance road marking paint.
Looking for reliable road marking equipment?
Henan Huayang is a global leader in road marking machine, offering products including:
✔ Manual and self-propelled marking machines
✔ Thermoplastic melters and preheaters
✔ Glass bead distributors and road marking removal machines
✔ Heavy-duty truck-mounted marking systems
Contact our professional team today for customized road marking solutions!